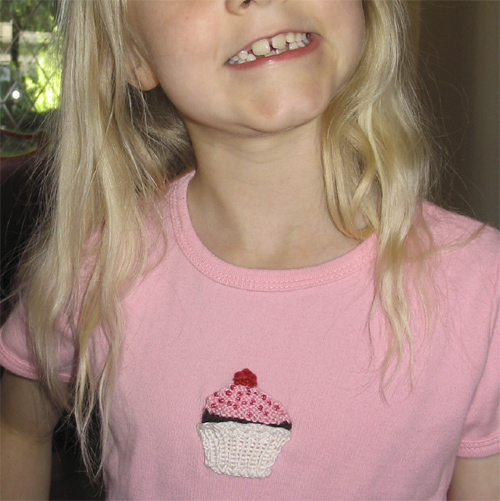
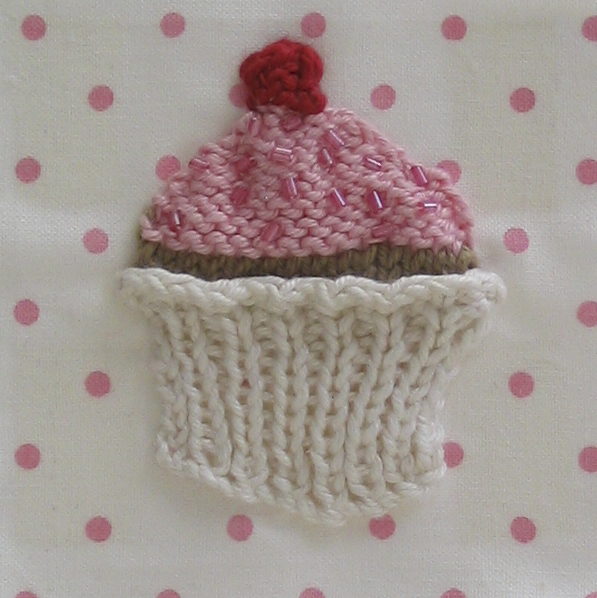
Toby seemed to cope well yesterday and was pretty calm and happy after arriving home on the minibus. It’s so strange not having him around in the day and I’m like a butterfly – just flitting from one thing to another. As usual knitting is keeping me sane! I’ve been playing around with ideas and considering that knitted corsages are ‘all that’ right now I thought I’d vary the theme. The result is a knitted badge / T shirt decoration on my favourite theme of fairy cakes. Modeled here by the lovely Amy:
The instructions to make it are below:
Abbreviations:
K = Knit, P = Purl
PF&B: Purl into the front and back of the stitch so increasing a stitch.
K2tog: Knit 2 stitches together, so decreasing by one.
P2tog: Purl 2 stitches together, so decreasing by one.
K2togtbl: Knit 2 stitches together through their back loops, so decreasing by one.
P2togtbl: Purl2 stitches together through their back loops, so decreasing by one.
Pattern:
Using 2.75mm (US 2) needles and 4ply/DK weight cream yarn, Cast on 15 stitches for the cake case
Row 1: (K1, P1) 7 times, K1
Row 2: (P1, K1,) 7 times, P1
Row 3: as row 1
Row 4: as row 2
Row 5: as row 1
Row 6: as row 2
Row 7: as row 1
Row 8: as row 2
Row 9: K1, (PF&B, K1) 7 times (22 stitches)
Row 10: (P1, K2) 7 times, P1
Row 11: (K1, P2) 7 times, K1
Row 12: Cast off, keeping ribbing correct, cut the yarn from the work leaving a short tail for weaving in later.
Row 13: With chocolate cake coloured yarn pick up and knit 15 stitches from the back of the finished case (around 1 row down from the cast off edge) taking 1 alternately from the purl rib and 1 from the knit rib.
Row 14: Purl
Row 15: Change yarn to pink colour for the icing and knit 1 row
Row 16: Knit
Row 17: Purl
Row 18: Knit
Row 19: P2tog, P11, P2togtbl
Row 20: K2togtbl, K9, K2tog
Row 21: P2tog, P7, P2togtbl
Row 22: K2togtbl, K5, K2tog
Row 23: P2tog, P3, P2togtbl
Row 24: Cast off remaining stitches, cut the yarn from the work leaving a short tail for weaving in later.
Cherry on the top:
Cast on 4 in red yarn.
knit 1 row
(P2tog) twice, pass 1st stitch over the second and pull end through to secure.
alternatively you could use a fabric flower instead of the cherry or cut a small circle of red felt.
To Finish:
Sew cherry on to top. Sew in ends neatly on reverse. Sew on beads / sequins and attach to T-shirt / tea cosy / greeting card etc…
Copyright © Julie Williams 2006.

I had a little one start school and a littler one start playschool this week too. The house is so quiet! Once I catch up with a little housework, I’ll be tucking into some crafts too.
Love the bunnies, and the cakes look scrumptious.
LikeLike
Hi
Thanks for your kind comment. Your blog is very nice. I love your little rabbits and cup cakes. You should sell them.
LikeLike