Working on this new pattern on and off over the last year has been an exciting and slightly novel thing for me. It’s the first time I’ve made a pattern from scratch with the intention of it being a pattern, if you see what I mean. All of the other animal patterns have come about because I wanted to knit them as finished items rather than with the original intention of sharing them in pattern form and so for most of them I had years of tweaking and lots of knittings before arriving at the final patterns.
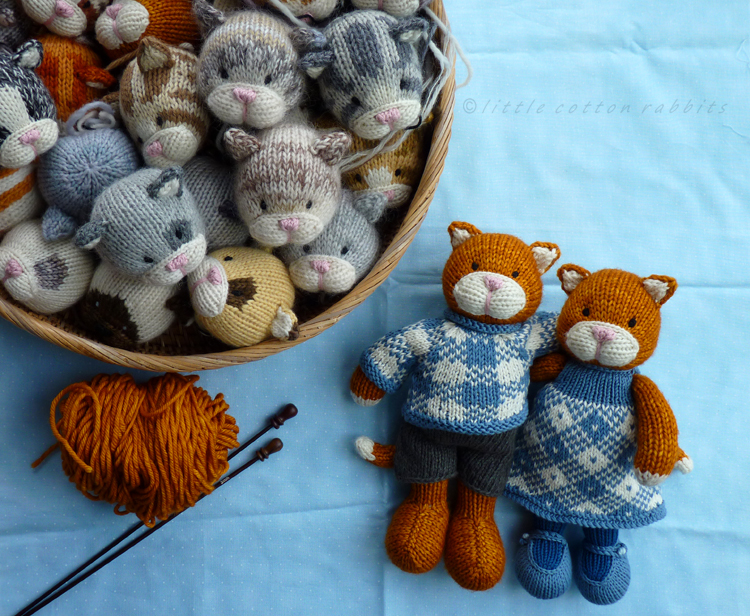
This time I started off with a basic idea sketched out and then knitted up some trial runs (the earliest of which did not go well). But I’ve persevered and after lots of rejected test samples I arrived at one that I was pretty happy with. Then it was just down to playing around with ear placement, head length, tail tip and a few more little bits of fiddling and tweaking. Anyway, I’m satisfied enough to now release the patterns, so here is my little cat boy and girl, both clad in plaid 🙂
 It was hard to decide exactly what sort of cat should be in the pattern – after all there are so many different breeds, from refined pure-bred Persians to lowly but loveable moggies. So because I couldn’t decide I’ve included in the pattern 4 extra head designs which are interchangeable, so you can make either a plain coloured cat, or a cat with a white blaze, a cat with an eye patch, a Siamese cat or a tabby. There are little bits that you can combine from these different designs to make your own unique looking cat, a bit like a selection box (sorry I couldn’t resist taking this photo – hope it’s not too creepy!)

Here are some of the heads I’ve made so far from the pattern (all instructions and details of yarns used for these are included with both patterns)…

As usual with a new pattern release I’m on tenterhooks, waiting for the first projects to appear on Ravelry. It’s so exciting to see what other people have made from the patterns so please come and add yours to the group if you give any of the patterns a try.
The new patterns are now live on both Ravelry and Etsy . I so hope that if you give any of them a go you have fun knitting from them x